


If you’re a filmmaker, videographer, or any type of visual creator, then the chances are you’ve already come across LUTs. But what is a LUT? Read on to find out everything you need to know about them, including how to use LUTs, and why they’re so important for filmmakers today.
What does LUT mean
First and foremost, LUT is an acronym. It stands for “lookup table”.
What are LUTs?
So, what exactly are lookup tables? LUTs are tools used in image and video processing to map input color values to desired output values. In other words, they enable quicker color grading or adjustments.
By applying predefined color transformations, LUTs help you achieve specific visual styles, such as enhancing contrast, changing hues, or emulating film looks, without having to manually adjust individual image parameters. They’re widely used in photography, filmmaking, and graphic design to streamline color correction and stylization workflows.
LUTs are important for editors and color graders because they provide a really fast, consistent way to apply quite complex color transformations across multiple shots or projects, ensuring visual continuity and efficiency.
By using LUTs, editors can quickly achieve specific looks, match different camera outputs, or correct colors, which is essential for maintaining a cohesive aesthetic in any film, video, or image. LUTs also save a lot of time by removing the need for manual adjustments on each shot, allowing you to focus more on the creative aspects of your work.

Types of LUTs
There are four main types of LUT that are used in filmmaking:
1D LUTs (One-Dimensional LUTs)
These adjust individual color channels (red, green, blue) independently. They are simpler and mainly used for basic color correction, such as adjusting brightness, contrast, or gamma.
3D LUTs (Three-Dimensional LUTs)
These map a combination of color values across all three channels (RGB) and offer more complex color grading. 3D LUTs are widely used for creative looks, film emulation, and advanced color correction.
Calibration LUTs
Designed to standardize and correct the color output of monitors or cameras, calibration LUTs are used during production. These ensure that what you see on your screen or camera matches the intended color profile.
Creative LUTs
These are used to apply specific looks or styles to footage, such as cinematic tones, vintage effects, or filmic color palettes.
How do LUTs work?
Now that you know the meaning of LUT and understand what they are, it’s time to understand how they work. LUTs remap the original color values of an image or video to new values based on a predefined set of instructions. These instructions can adjust several key elements of the image:
Light and exposure
LUTs can control the brightness and shadows of an image, either lifting dark areas or toning down highlights, which helps balance the overall exposure.
Contrast
LUTs modify contrast by adjusting the difference between the brightest and darkest areas. High-contrast LUTs will deepen shadows and brighten highlights, while low-contrast LUTs will make the image appear softer and more evenly toned.
Color grading
LUTs alter the hue, saturation, and temperature of colors. They can create dramatic shifts like making warm tones cooler, desaturating or intensifying colors, or adding tints like teal-orange or sepia. This allows for creative adjustments, including stylized looks or matching shots from different lighting conditions.
Gamma and tone curves
LUTs can affect the midtones by adjusting the gamma, which changes how bright or dark the middle ranges of an image are. Tone curves control the relationship between the input and output values of brightness, creating smooth transitions between shadows, midtones, and highlights.
The benefits of using LUTs
There are a whole host of benefits for filmmakers when it comes to using LUTs.
Saving time
LUTs streamline the color grading process by applying complex color adjustments with a single click. Instead of manually tweaking exposure, contrast, or color values for each shot, editors can quickly achieve the desired look, saving hours in post-production. If you’ve ever had to manually tweak every shot in your film, you’ll know how painstakingly slow this process is.
Consistency across projects
LUTs ensure that the same color adjustments can be applied consistently across multiple shots, scenes, or even different projects. This is crucial for maintaining visual continuity, especially in films or videos where scenes are shot under varying lighting conditions.
Creative flexibility
LUTs offer a wide range of creative possibilities by giving editors access to pre-built color transformations. Whether it’s a cinematic look, a vintage feel, or a high-contrast, vibrant style, LUTs provide the flexibility to explore various visual aesthetics quickly.
Matching multiple camera outputs
When using footage from different cameras, LUTs help match color profiles and maintain visual uniformity. Camera-specific LUTs are often used to align color science between different camera brands or models, ensuring a seamless look.
Non-destructive editing
Applying a LUT is a non-destructive process, meaning the original image or video data remains unchanged. Editors can experiment with different LUTs or make further adjustments without compromising the original footage, maintaining flexibility throughout the editing workflow. If you don’t like the given look of the image, you can just remove the LUT and start again.
Professional look
LUTs give even novice editors access to professional-quality color grading. With LUTs designed by experienced colorists, users can quickly add a polished, cinematic look to their footage. They’ve taken YouTube color grading to the next level.
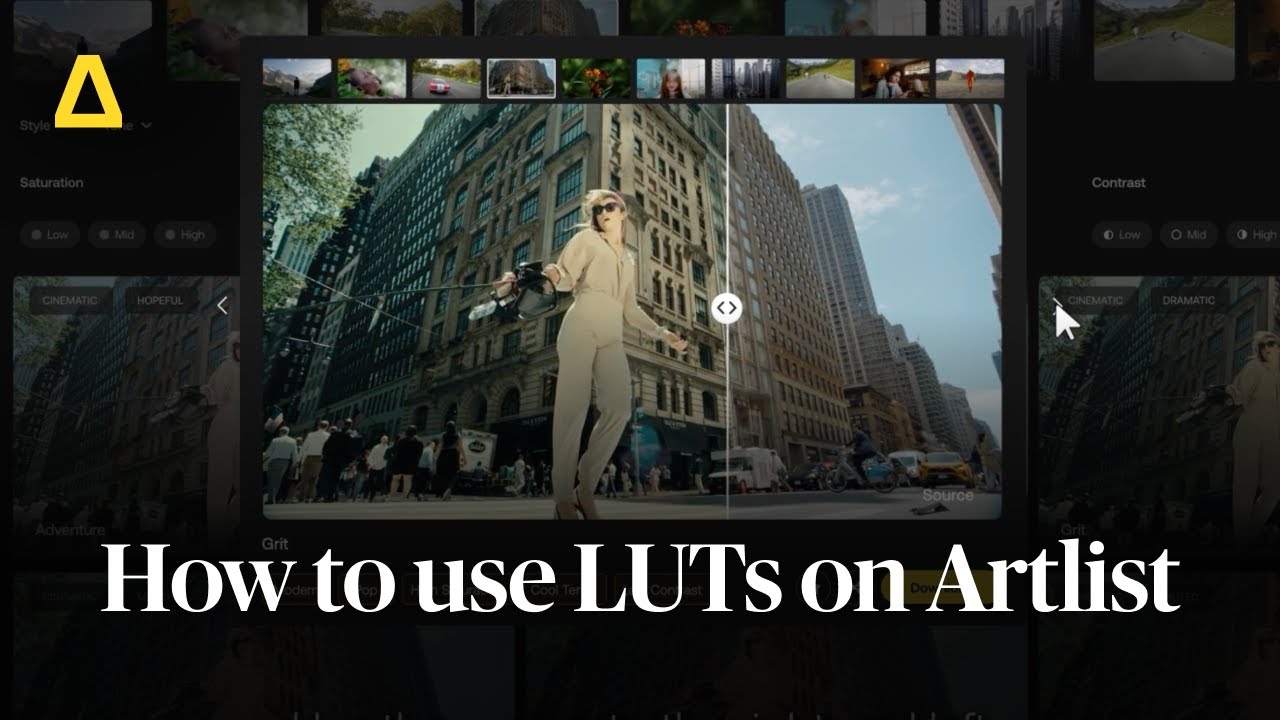
LUTs on Artlist
You can access and download hundreds of premium LUTs, designed by leading color-graders, right on Artlist. LUTs are included in all Max plans, and also Footage & Template plans. You can learn more about the different Artlist plans in our full detailed breakdown.
It’s quick and easy to find the right LUT for your video, thanks to the ability to select sample footage and the intuitive filters. And they’re designed to work with all leading editing software.
Learn more about Artlist LUTs in our dedicated article.
How to implement a LUT in your edit
Implementing a LUT in post-production is usually an easy, straightforward process and typically involves the following steps, depending on the software you’re using. Here’s a general guide:
1. Import the footage
Open your video or image editing software and import the footage or images that you want to apply a LUT to.
2. Add a color adjustment layer
Create a new adjustment layer specifically for color correction or grading. In most editing software, this is called a Color Correction or Adjustment layer. This layer allows you to apply the LUT without affecting the original footage.
3. Load the LUT
Look for the option to apply a LUT within the color grading or effects panel of your software. This option might be labeled as Apply LUT, Look, or Custom LUT.
- In Adobe Premiere Pro: Go to the Lumetri Color panel, then under Basic Correction or Creative, select the Input LUT dropdown and choose Browse to locate the LUT file.
- In DaVinci Resolve: Open the Color workspace, right-click on the Node where you want to apply the LUT, and select 3D LUT to load your LUT file.
- In Final Cut Pro: Select the clip, go to the Effects browser, search for Custom LUT, drag it to the timeline, and choose your LUT from the options or import one.
4. Fine-tune the LUT
After applying the LUT, you may want to tweak a few things, such as the intensity, exposure, or contrast, to better suit the look you’re aiming for. Most software allows you to tweak these parameters to suit your footage.
5. Apply to multiple clips
If you need to apply the same LUT across multiple clips, you can now either copy the adjustment layer with the LUT or apply the LUT at the project level if your software supports that.
6. Export the final footage
Once you’re satisfied with the look, proceed with exporting your footage. The LUT will be applied during the rendering process, and the final video or image will reflect the color adjustments made.
By following these steps, you can efficiently apply LUTs in your post-production workflow to achieve consistent and professional color grading results.
Can LUTs be used in production?
LUTs can also be used during the production process while filming, and they play an important role in on-set monitoring and decision-making.
On-camera monitoring
Many modern cameras allow you to load LUTs directly into the camera. This enables the crew (especially the director, cinematographer, and colorist) to preview the footage with a specific look applied, rather than viewing the raw, ungraded footage. It gives a better sense of how the final image will appear.
External monitors
LUTs can also be loaded onto external monitors used on set. This is useful for directors, DPs, and clients who want to see a graded image while filming without altering the original footage. The LUT applied to the monitor gives a better idea of the final output, helping with lighting and composition decisions.
Previsualization for post-production
By using a LUT on set, filmmakers can preview the color grading choices they plan to apply in post-production. This helps ensure that the shot’s lighting, set design, and overall visual style match the intended look, reducing surprises in the editing room.
Camera log formats
As you may well know, many cameras shoot in log formats (like S-Log or C-Log), which capture a wider dynamic range but result in flat, desaturated images. Applying a LUT during production helps to bring these images to life, giving a more accurate representation of contrast and color while retaining the flexibility for post-production grading.
Consistent communication
Using LUTs on set ensures that everyone involved in the production is aligned with the visual tone of the project. It allows the director, DP and colorist to communicate a shared vision from the beginning, reducing the need for rework later on.
Related Posts


Potential errors when using LUTs
It’s worth noting that errors can occur when using LUTs, especially if they’re not matched correctly with the footage. Mismatched LUTs, such as applying one designed for log footage to standard Rec.709 footage, can lead to overly saturated or high-contrast images.
LUTs can also cause a loss of detail by crushing shadows or clipping highlights, especially if the footage falls outside the expected exposure range. Color banding may also happen if the footage has low color depth, particularly when you’re making extreme adjustments.
Overprocessing is another common issue when relying too heavily on LUTs without further refinement, resulting in unnatural skin tones or exaggerated colors. Also, LUTs are fixed adjustments and lack flexibility, meaning they can’t adapt to variations in lighting or exposure within the footage.
If on-set LUT previews are not properly applied in post-production, they can cause discrepancies between what was seen during filming and the final output. Ensuring compatibility with hardware or software is also important to avoid potential application errors.
LUTs vs presets
Put very simply, LUTs focus on color remapping, while presets apply a broader array of adjustments, including color, exposure, and effects.
LUTs are best thought of as mathematical tools that are used primarily for color grading, remapping input color values to achieve specific looks, like film emulation or stylized color tones, and are commonly used in video editing.
Presets, on the other hand, are saved combinations of multiple adjustments — such as exposure, sharpness, and effects — applicable to both photo and video editing. While LUTs focus solely on color transformation, presets offer broader image or video enhancement, affecting various aspects of the footage beyond just color.
Wrapping up
So, that’s everything you need to know about LUTs (Lookup Tables), which are essential tools for filmmakers and visual creators. They are a really quick and consistent way to adjust color, light, and contrast across multiple shots, ensuring visual continuity and, most importantly, saving you so much time.
Now that you’re fully clued up about LUTs, you can head to Artlist, download some LUTs and stock footage, and begin experimenting today.
Did you find this article useful?


